

This tutorial is fairly easy, it's really all about temperature and being able to pour two jugs at once. It's a basic Melt and Pour Soap embed colour soap project. If you are a beginner and feel confident with temperatures this is totally doable, if you are completely new to Melt and Pour Soaping our recommendation is to get a few easier embedding projects under your belt first.
The amount of "new" Goatsmilk Soap needed will depend on how much soap you'll be using as embeds. Iti's the same with the quantity of colour - it all depends on what colour the offcuts are, and what colour you want to make the next batch of soap from them!
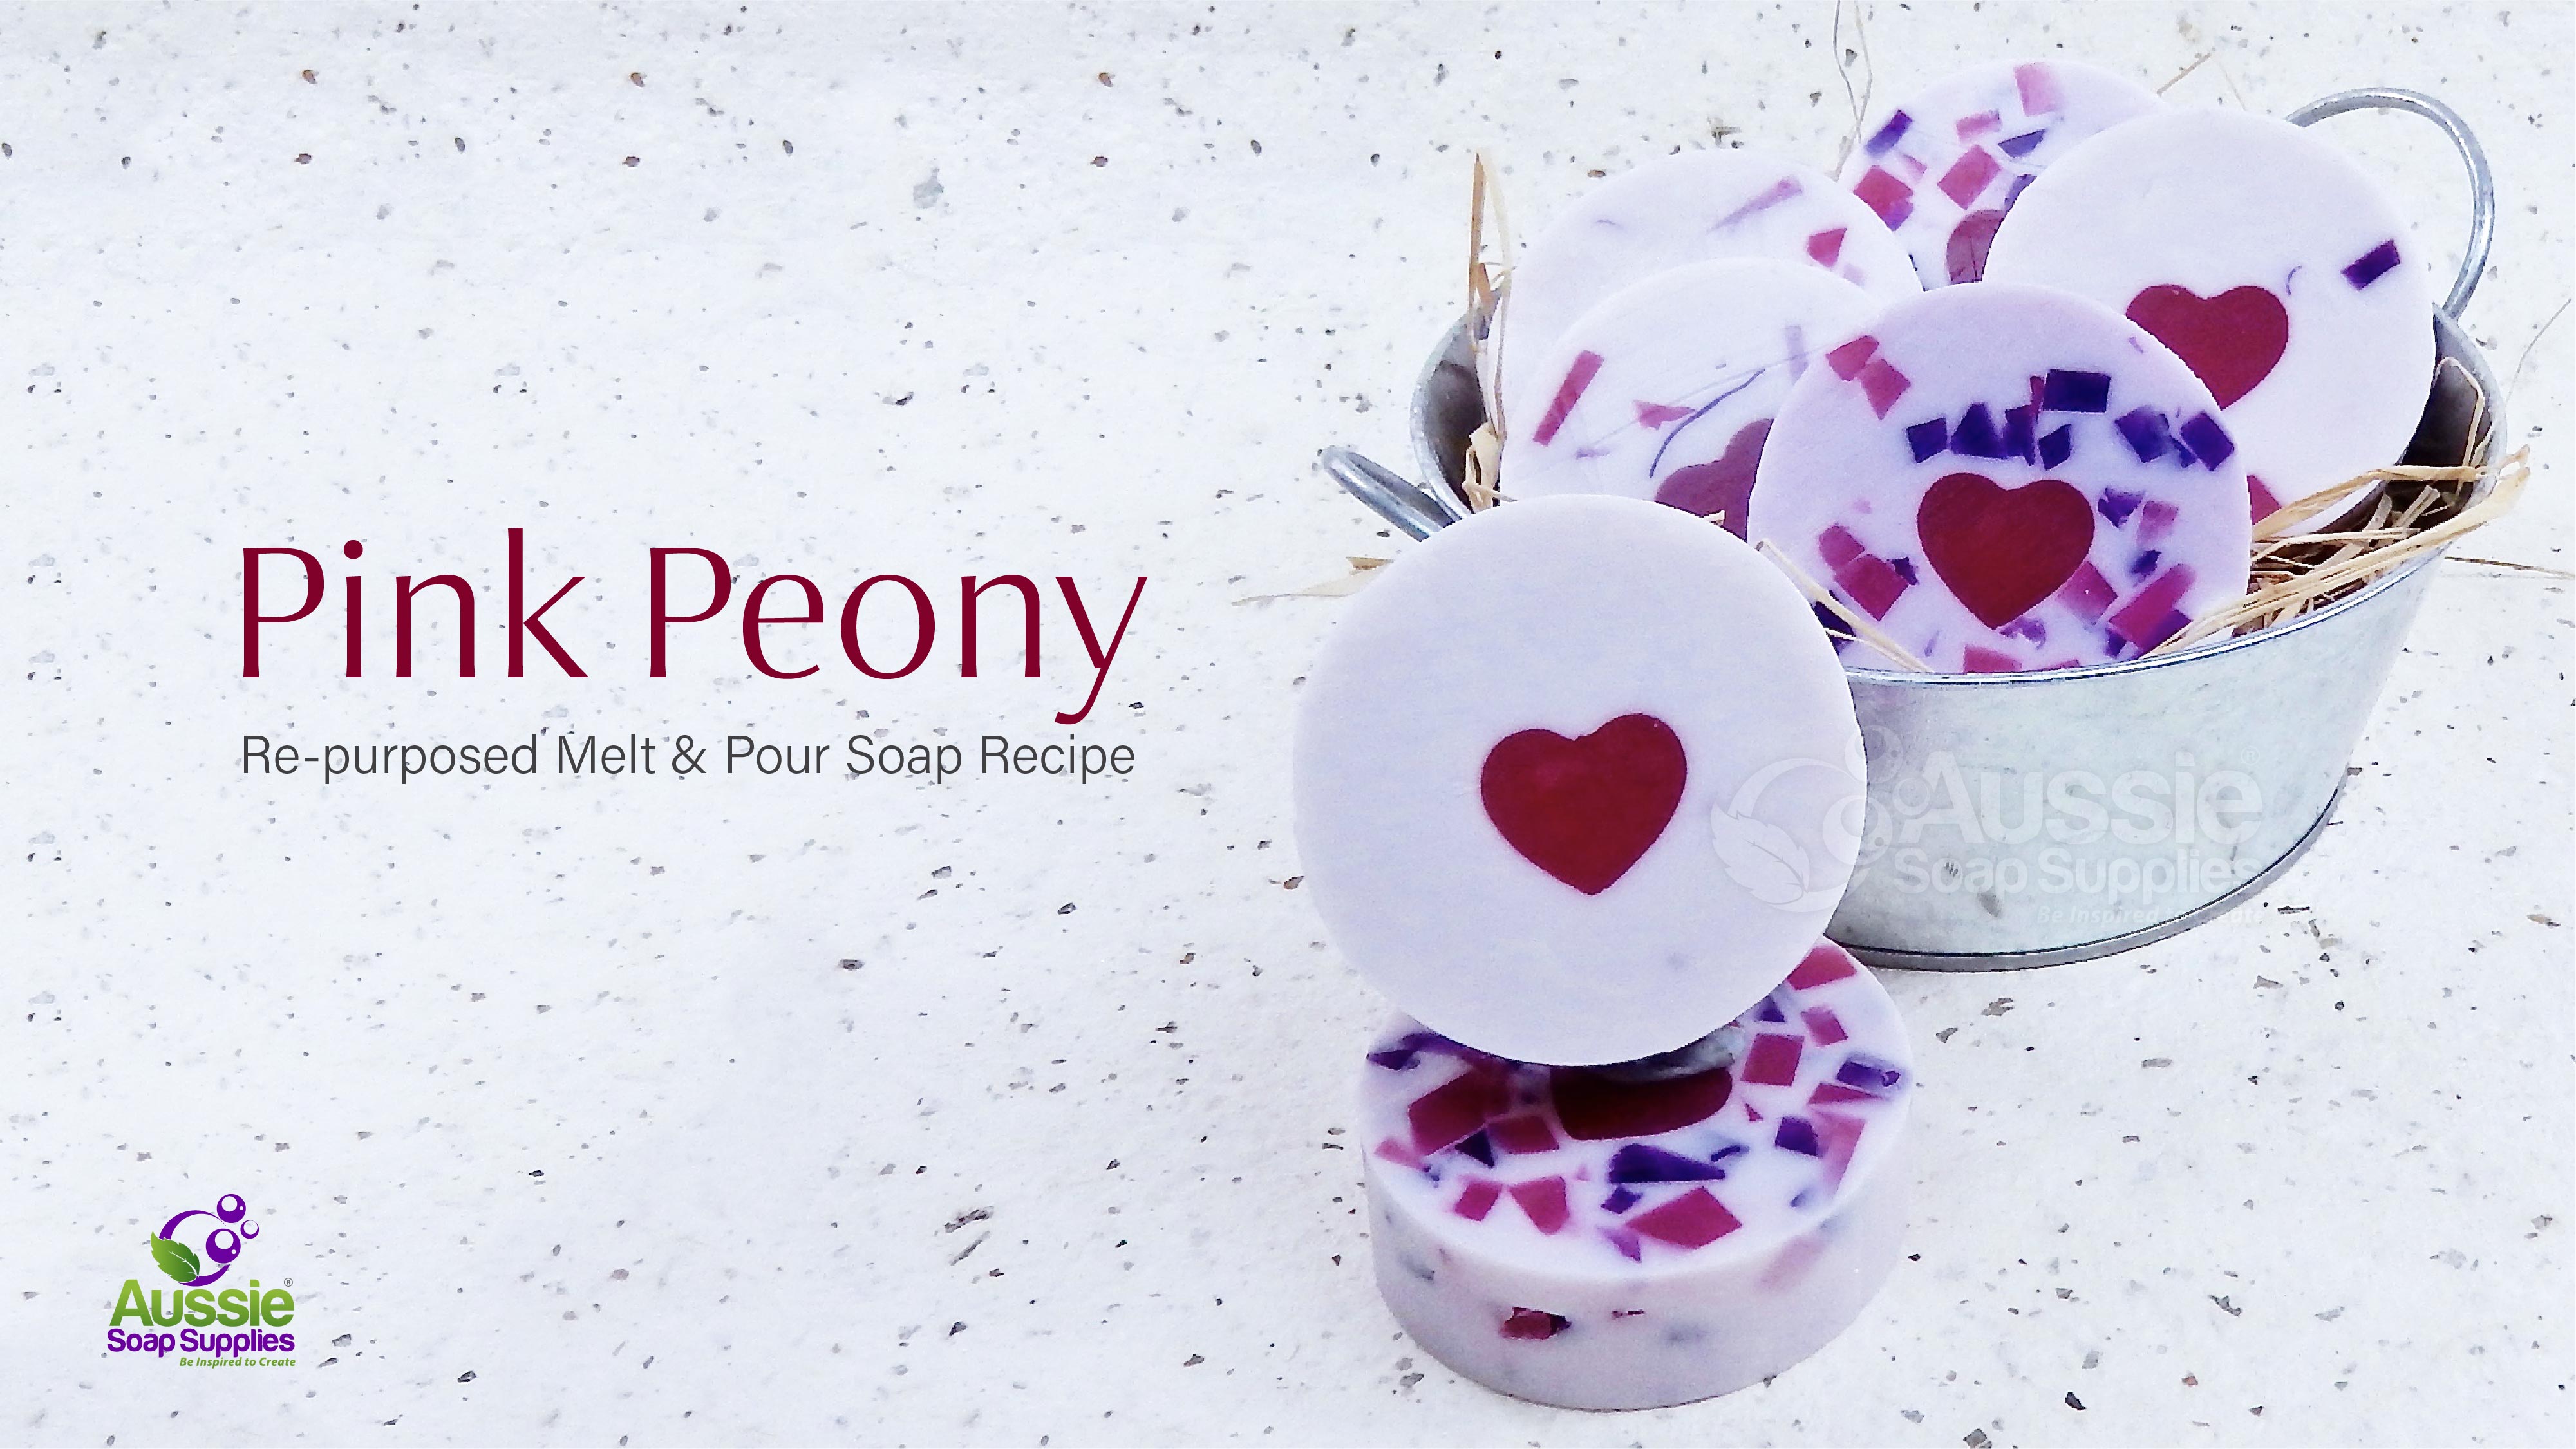
Like other embed projects, the temperature of the soap, the amount of embeds and style of soap can all be manipulated to give several different styles of soap in the one pour.
If you have a quick look at the last graphic, you'll see 3 slices of soap - and all have a differing amount of embeds in the main pour:
1. Just the heart
2. A fairly light sprinkling of embeds
3. A heavily embedded slice
You can let gravity arrange this - ie you'll let the weight of the embeds determine their own level in the vertical mould as it sets, or you can take a layered approach as I did. This means you'll divide the diced embed soap pieces into portions of "none", "small quantity" and "large quantity". Okay, let's go with this project!

You'll need:
- 600g plus Goatsmilk Natural Melt & Pour Soap Base
- 500g offcuts Natural Melt & Pour Soap Base - coloured or uncoloured
- 10g/ml (1 1/2 - 2 teaspoons) Pink Peony Fragrance - or we suggest using Blushing Orchid Fragrance or Baby's Breath Fragrance
If using Blushing Orchid you may need some Vanilla Colour Stabiliser depending on the design as this fragrance does contain some vanilla -
180g pink Melt and Pour Soap offcuts or fresh clear soap to make the heart embed
- Pink Raspberry Mica
- Royal Purple Liquid Pigment Dispersion
- Flexible Heart Embed Mould
- Flexible Column Mould
*In my batch I used:
600g fresh Goatsmilk Melt and Pour Soap Base
300g left over pale pink and pale mauve offcuts - I coloured with
Mica to darken the shade
200g Brite Pink offcuts - which I coloured with Royal Purple Liquid Dispersion for the dark violet embeds
180g left over Clear Soap Base which was coloured with pink and red tones and - I added Raspberry Mica to this for the heart embed
Equipment:
Stirring spoons or spatulas
2 x microwave safe jugs - Holding around 250ml and 1000ml
Electronic Scales - If you have them
Isopropyl Alcohol in a Spritzer Bottle - For eliminating bubbles, useful but not essential
Method:
- Set out the ingredients and equipment ready to go.
- Attach the two halves of the two moulds firmly together by running your fingers down the tongue and groove side seals. You can clip together the sides of the large column mould if you feel more comfortable.
- Stand the embed mould into a heavy based jug or glass to keep it steady. Melt the 180g of clear soap and colour with some Raspberry Mica, add a dropper of Peony Fragrance and then stir well to remove any lumps and pour into the embed mould and allow to set.

- Whilst the embed is setting up, dice the goatsmilk soap into the larger jug, lightly cover, and put in the microwave to melt on medium in short bursts.
- Now dice the smaller pink and violet embeds - i sort mine according to size and colour.
- Unmould the heart embed soap and stand this into the column mould (support the base of the column mould if you feel you need to) and I sit 4 of my stirring sticks to keep it in the centre as I pour the soap. I give this a spritz with Isopropyl Alcohol at this point.

- Add approximately 10 - 15g/ml of Fragrance to the melted Goatsmilk Soap, and stir well to combine. I also tossed in the tinsy shavings of pink and violet soaps to make that very, very pale pastel shade.
- Pour approximately 10 - 20cm goatsmilk soap into the base and spritz with alcohol. If you are leaving it without embedded pieces (as I did) allow this to set up for a few minutes.
- Spray the chopped embed soap pieces with a generous amount of alcohol ready to embed.
- Test the top of the surface of the first pour and spritz with alcohol and then pour another deep layer of goatsmilk soap - I use the side of the mould to avoid pouring directly onto the previous layer. Then sprinkle as many small embed pieces of soap as you like and then top up with a little more goatsmilk soap and give a spritz with alcohol.

- Allow this to set up a bit. You may need to remelt the goats milk soap if it's starting to set up.
- Now spritz the second layer and repeat this process - I went heavy on embeds at the top and also added more colour shreds to the goatsmilk - you can see this variation in the unmoulded log.
- Allow several hours or overnight so to completely set.
- Peel away the top and then carefully remove the soap taking care to leave the "neck" portion on the soap.
- If necessary, scrape the seam of the soap log lightly with the back of a knife to remove any soap overpour that has stayed in the seam.

- Slice it up and wrap!


