
This is a fun soap when you want to get a bit creative and see what you have made as you slice the soap loaf! A combination of liquid Melt and Pour Soap which is poured whilst still liquid into medium traced Cold Process Soap layers creates this interesting effect. You could of course make an arctic themed loaf, but warm summer colours were the feel I was going for.
I used both our Flexible Mould - Loaf (Regular) and our Small Silicone Loaf Mould for this quantity of soap. Alteratively you can make one larger loaf using Wooden Loaf Mould with Silicone Liner
Ingredients:
- 100g Cocoa Butter
- 600g Olive Oil
- 250g Coconut Oil
- 250g Palm Kernel Oil
- 174g Sodium Hydroxide (Caustic Soda/Lye)
- 320 - 450 mls/g of Distilled Water - Use the larger quantity if you are a beginner
-
for the "rivers of lava", I used Clear Melt & Pour Base:
- 1 x 150g diced Clear Melt & Pour Soap coloured with Citrus Orange Liquid Lake
- 1 x 150g diced Clear Melt & Pour Soap coloured with Watermelon Red Liquid Lake and Carmine Red Liquid Pigment Dispersion
- 50ml (approx 10 teaspoons) of Pineapple Papaya Fragrance or similar tropical fragrance or Essential Oil Blend
- Eco Holographic Glitter to decorate the finished loaves
Equipment:
All your regular Cold Process Soap making equipment and Safety Gear including Goggles and Gloves
Large Jug for main batch
2 x small jugs for the Melt and Pour Soap
Small beaker to hold the Fragrance - helpful, not essential
Isopropyl Alcohol and Spritzer Bottle – optional – to prevent soda ash if you decide on a textured top
Method:
The instructions below are edited down, as full instructions which MUST BE READ FOR SAFETY, are on these links: see our Cold Process Soapmaking Instructions. You can also watch Soap Queen's YouTube Series on Cold Process Soapmaking.
If you are a beginner, we recommend you make a few batches before attempting this soap as it can be a little overwhelming following so many steps when making your first soap.
- Weigh all ingredients and have the moulds ready to go.
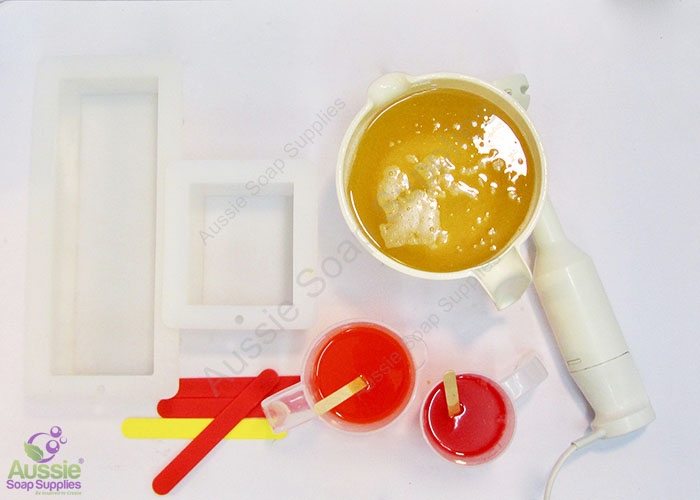
- Prepare the Lye Water and leave in a well ventilated area to cool whilst you prepare everything else.
- Melt the oils for the Cold Process Soap.
- Place the Clear Melt & Pour Soap into two jugs.
- Melt the Melt & Pour Soap on medium low in the microwave, heat to approximately 60°C.
- Now add colour to each jug and approximately 1 teaspoon of the measured fragrance and set aside.
- I used 10 drops of Citrus Orange Liquid Lake for the orange, and 5 drops Watermelon Red Liquid Lake with a touch of Carmine (which is optional).
- Bring the cold process soap to thin trace, mix through the rest of the fragrance and bring to medium trace.
- Now pour a layer of cold processed soap approximately 1 - 2 cm deep in the base of the loaf mould, and pull it into a textured surface (so you have little mountains and valleys of soap).
- Check the Melt & Pour Soap is still liquid (if it's setting up, give it a quick blast in the microwave) and pour a thin layer using approximately half the soap in each of the jugs.
- Pour the melt and pour soap in different areas so you have a nice spread of the two colours throughout the soap.
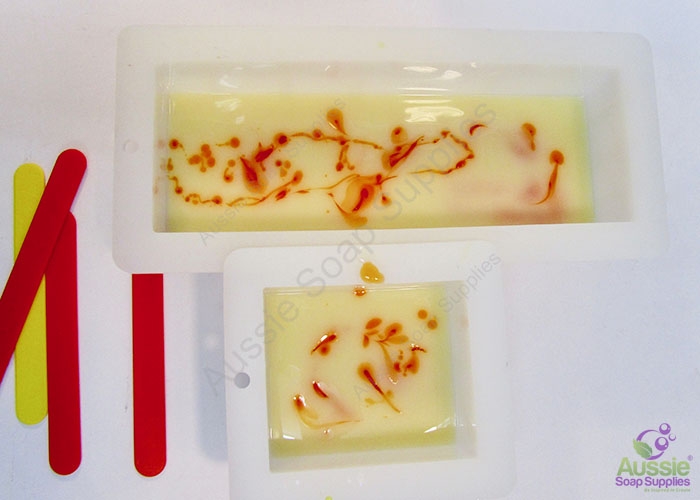
- Next pour another layer of cold process soap approximately 2cm deep (a deep layer) over the melt and pour soap.
- Now repeat another splodgy layer of liquid melt and pour soap, using the rest of the melt and pour soap.
- You can leave the soap "as is", or if you want to you can use a chop stick to give it a little swirl under the surface.
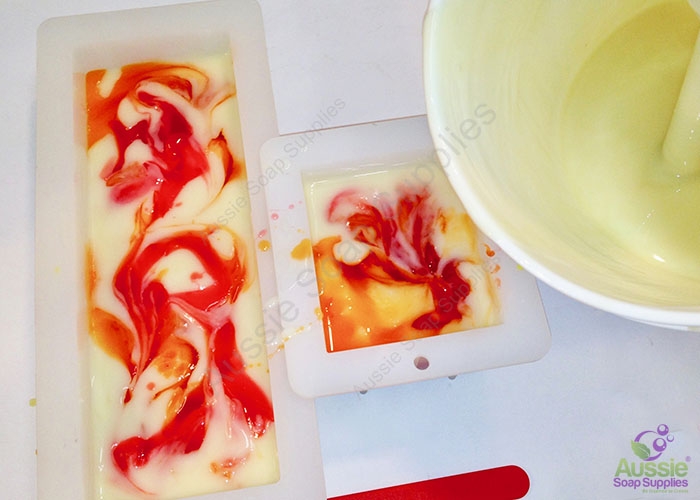
- Finish by filling the mould with the rest of the cold process soap.
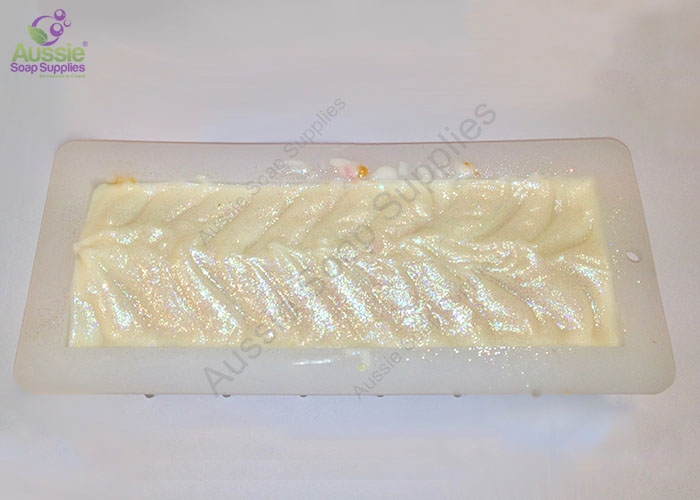
- Continue with the deep layers finishing with cold process soap on top.
- Make the pattern on top of the soap you would like, so it has a nice texture, and then sprinkle with Holographic Glitter.
- Spritz with Isopropyl Alcohol to keep the ash at bay.
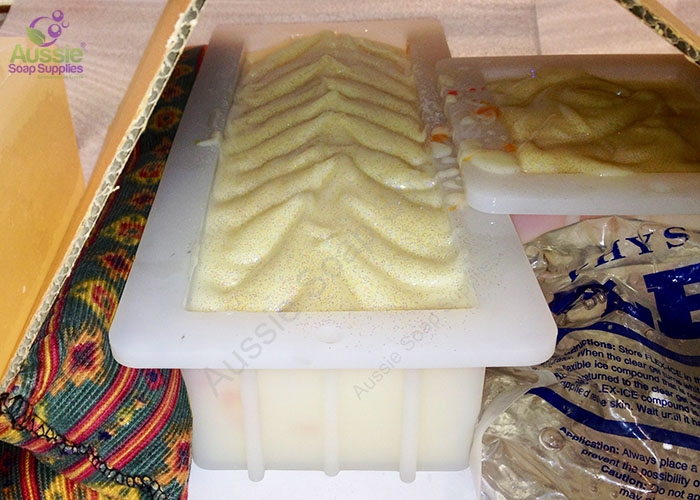
- Now put your soap to bed (I used extra insulation of hot packs as it was a cold winter day when I made this batch).
- Unmould the soap in several days, and slice the loaves to reveal your own unique lava design inside your soap!
| Difficulty: | Intermediate |
| Yields: | 10 - 14 bars |
| Time: | 1 - 2 hours |


