

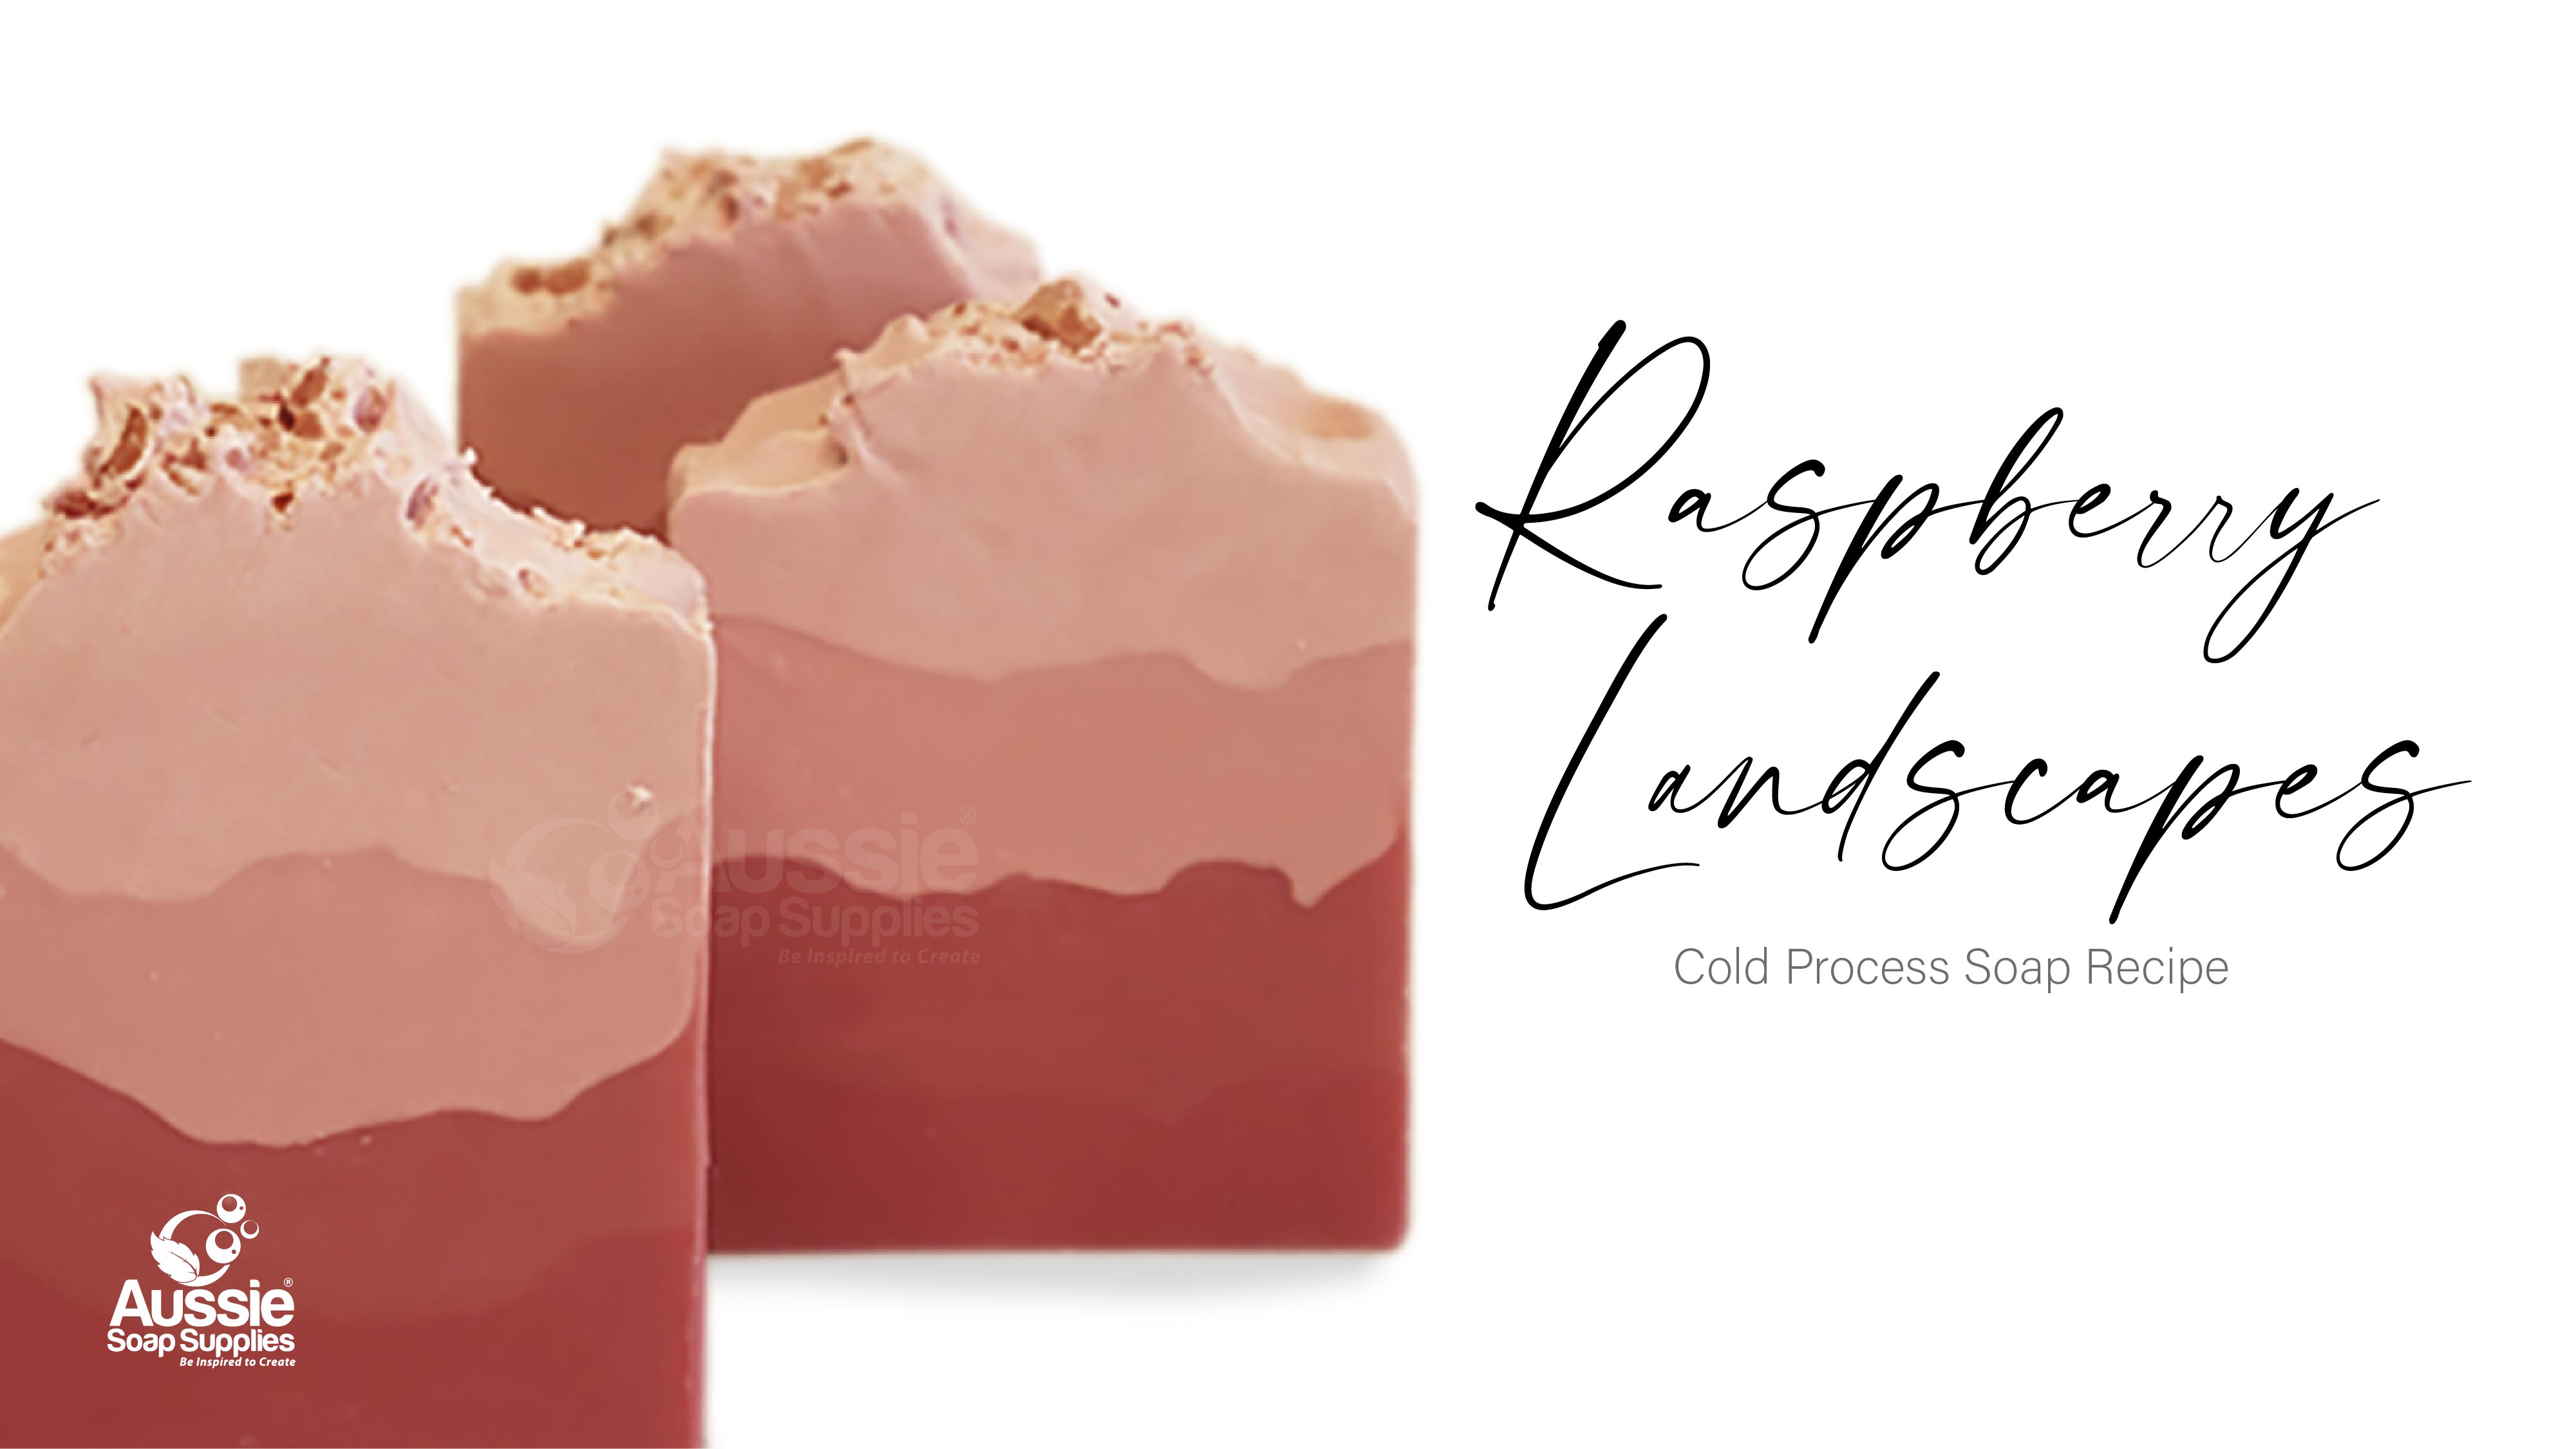
This dreamy ombré style Cold Process Soap Loaf features Cocoa Butter and Apricot Kernel Oil, and as I couldn't decide whether to use Pink Himalayan Salt or Melt & Pour Soap berries to decorate the top, I used half of each! Just delete whichever you don't want to use from the trolley items!
The key to this type of layering is to ensure you have a firm trace and that the fragrance doesn't seize the soap - so I mix to light/medium trace and wait a little while it sets up a bit in the mould before creating the valleys and hills for the next layer. By the time you get to the final layer it is nice and firm to allow a beautiful, 'mountainy' textured top.
Ingredients
- 60g Cocoa Butter Pellets
- 400g Olive Oil
- 90g Apricot Kernel Oil
- 300g Coconut Oil
- 400g Palm Kernel Oil
- 187g Sodium Hydroxide (Lye)
- 400 - 450 mls/g of Distilled Water - Use larger quantity if you are inexperienced
- 45g/ml Black Raspberry & Vanilla Fragrance Oil
- Titanium Dioxide Powder
- 10g Candy Pink Mica
- Coarse Pink Himalayan Salt - for decorating the top
and/or - Melt & Pour Soap Offcuts, clear to make red and black raspberries
- Wooden Loaf Mould with Silicone Liner
- Flex Embed Mould - Mini Blackberries & Raspberries
- Isopropyl Alcohol and Spritzer Bottle - optional
Equipment:
All your regular Cold Process Soap making safety gear equipment including Goggles and Gloves
4 x individual Jugs, one for each colour
Digital scales
Small beaker to hold the Fragrance - helpful, not essential
Small beakers/cup to hydrate powdered colours
1 teaspoon for measuring
1 spoon or spatula to create the shape of the valleys in each layer of soap
Note: All colour addition amounts are added in the liquid dispersed state, not powders.
SOAP POURS: 350g per jug x 4 = 1400g
Jug 1 Base - this is the darkest colour
Jug 2 first layer - this is the mid shade colour
Jug 3 second layer - this is the second lightest shade colour
Jug 4 top fourth layer - this is the lightest shade
FRAGRANCE: Add 11g to each of the four jugs
COLOUR PREP:
Disperse: 2 teaspoons or 4g Candy Pink Mica dispersed in 3 teaspoons water or oil
Place: ¼ to ½ tsp Candy Pink in a separate cup with or oil water for the first layer (to make it darker)
Mix: 3 teaspoons of Titanium Dioxide Powder in 40g water
Overview of Colour additions:
- ADD TO FIRST POUR: add an extra ¼ or ½ teaspoon of dispersed pink mica liquid
- ADD TO SECOND POUR: leave as is - no extra colour
- ADD TO THIRD POUR: add 2 teaspoons dispersed Titanium Dioxide mixture
- ADD TO LAST POUR: add 4 teaspoons dispersed Titanium Dioxide mixture
Method:
If you are a beginner, we recommend you make a few batches before attempting this soap so that you know what to expect. For how to make soap from Scratch, please see our Cold Process Soapmaking Instructions. You can also watch Soap Queen's You Tube Series on Cold Process Soapmaking.
If you are making soap berries to decorate the top of the soap, make these in advance, or whilst the lye water is cooling.

Set out equipment and ingredients, including preparing the colours and jugs, scales etc.
Bring the soap to a light trace, add the 2 teaspoons or 4g Candy Pink Mica dispersed in 3 teaspoons water or oil and then you are ready to divide the soap.
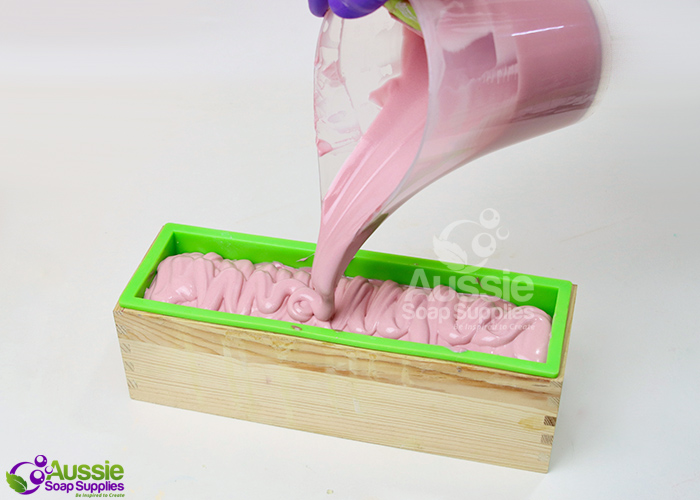
Now...prep all four jugs of light traced soap - add 350g into each.
Have spatulas ready to move the soap a little to ensure it doesn't start setting up between pours.

JUG ONE: BASE LAYER/FIRST POUR: Add an extra ¼ or ½ teaspoon of dispersed pink mica liquid and stir to combine.
Now add 11g fragrance to the jug and manually stir well to combine.
Pour into the mould.
Once the layer is holding its shape, use the back of the spoon to create some hills and valleys in the layer.
This should now be ready for the next layer - however, if the shape is not holding you will need to wait a little while and then try again.
Don't forget to keep the soap in the other three jugs workable by slowly stirring whilst it waits!

JUG TWO: 2ND LAYER/SECOND POUR: Don't add any colour to this layer! Use it as is :)
Do add 11g fragrance to the jug and manually stir well to combine.
Pour into the mould.
(As you can see from the graphic, I like to make this soap by pouring the top three layers from side to side, rather than along the length of the mould).

As previously, once the layer is holding its shape, use the back of the spoon to create some hills and valleys in the layer.

Don't forget to keep each jug's contents 'loose' by moving the soap with the spatula whilst it sits and waits.

JUG THREE: 3RD LAYER/THIRD POUR: Add 2 teaspoons dispersed Titanium Dioxide mixture and stir well to combine.
Add 11g fragrance to the jug and manually stir well to combine.
Pour into the mould.

JUG FOUR: TOP LAYER/FOURTH POUR: Add 4 teaspoons dispersed Titanium Dioxide mixture and stir well to combine.
Add 11g fragrance to the jug and manually stir well to combine.
Pour into the mould.

Allow the soap to sit to firm up a little and adjust the surface to your preferred shape.
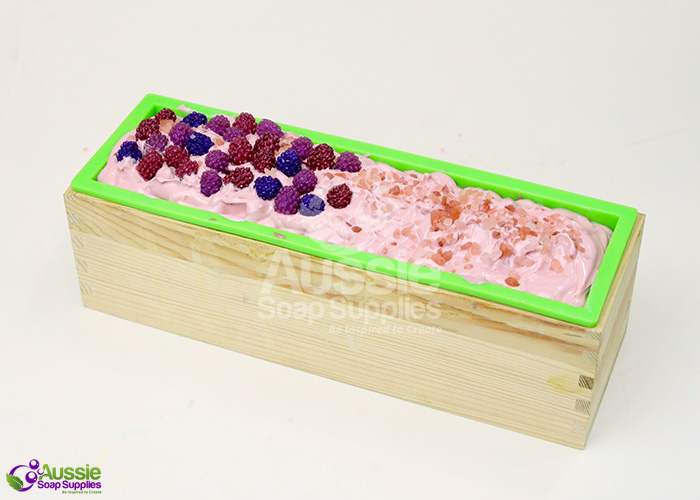
Set the decorations on the soap.
I did not gel this soap as I had Melt & Pour Soap decorations on top, so popped it into the fridge for several hours.

Leave in the mould for several days and then unmould.
I leave it for another few days prior to slicing.
Turn the soap onto its side to slice to avoid creating drag marks from the salt crystals.
Leave 4 to 6 weeks minimum prior to use.

| Difficulty: | Advanced |
| Yields: | 9 - 12 bars |
| Time: | 1 ½ hours |
| save: | No |
| sale: | No |


