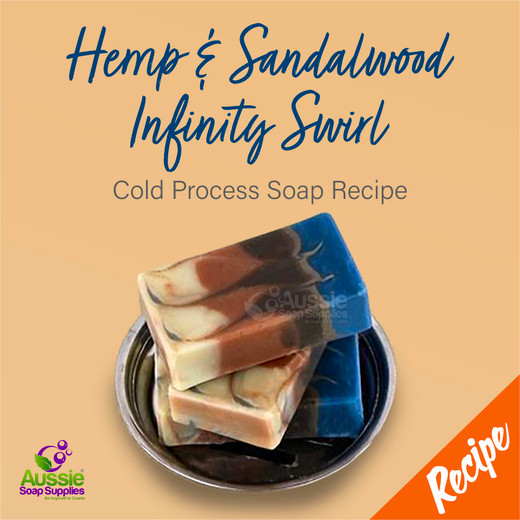
When we unpacked the shipment from Bramble Berry with the custom sectioning dividers it was time to get the soap pots out immediately! David has dived in and created two infinity swirl projects, with this being the first one.
This is an intermediate level project, so you'll need to be able to control a very, very light trace, work with non-accelerating scents and be patient - it takes a couple of weeks before the soap is hard enough to unmould!
Our slide show of the process is below, and also a link to Bramble Berry's video using this technique, but with a different mould. So if you haven't done this type of swirl before, just grab a coffee and watch! Soap Queen's Videos demonstrating this technique is HERE.
What you need:
- 100g Castor Oil
- 80g Hemp Seed Oil
- 80g Mango Butter
- 100g Coconut Oil
- 400g Olive Oil
- 370g Rice Bran Oil
- 400g/ml Distilled Water
- 149g Sodium Hydroxide (Lye)
- 35g/ml Sensual Sandalwood Fragrance
- 1 ½ teaspoon Caramel Mediterranean Clay
- 1 ½ teaspoon Chocolate Mediterranean Clay
- 1 - 2 teaspoons Ultramarine Blue Powder
- ½ teaspoon Titanium Dioxide Powder (or White Pearl Mica) - Optional - this lifts the buttery tones of uncoloured soap
(Trolley items include all four colourants ) - 20g Sodium Lactate Plus
- Multi-Pour Tool for Regular Loaf Mould
- Flexible Mould - Loaf (Regular)
Equipment:
- Your usual Cold Process Soaping equipment and safety gear including goggles and gloves
- Mini mixer or milk frother for mixing colours - optional
- Four jugs, each to hold around 420g traced soap and still take the hand balloon whisk
- Small cups for the colour mixing
- Thermometer
- Paper towels in case you need to grip the multi pour dividers - they can be quite slippery
- Chopstick to swirl the soap
- Heat mat - optional
Colour Preparation - if you are using powdered colours:
- Remove 20ml (4 teaspoons) Rice Bran Oil from the allocation and divide evenly into the 4 small cups
- Add one of the colourants into each of the cups
- Manually mix the pigments into the oil until moitened, then use a mini mixer or milk frother ensuring there are no dry spots
Mould Preparation:
- Assemble the multi pour tool into the mould using the 3 dividers to make four channels
- Place newspaper or similar to the side of your soaping area so you have somewhere to put the soapy dividers
Method:
If you are a beginner, we recommend you make a few batches before attempting this soap due to the hot gel. For how to make soap from Scratch, please see our Cold Process Soapmaking Instructions. You can also watch Soap Queen's You Tube Series on Cold Process Soapmaking.
- Prepare the soap as usual, don't forget to add the Sodium Lactate Plus to the lye water
- Check the temperature of the oils and lye water - it should be around 20 - 25°C. (If you soap too hot you will have a thicker trace)
- Now everything is ready to go!
- Bring the soap to a VERY light trace
- Divide the soap batter into the four jugs (using scales it's 420g per jug) and mix the colourants in well with a hand whisk. You can use all or less colour if you want a more subtle tone
- Add a quarter of the Sensuous Sandalwood Fragrance to each jug and stir manually to combine
- Line up the jugs in the colour order you have chosen
- Take the first colour and and HALF fill the section
- Now take the second colour and HALF fill that section, then continue for the other two remaining colours
- Now go back to the first colour and top up the mould to the rim of the loaf mould
- Top up the other three sections as well
- Set the jugs aside
- Now carefully remove the first divider - pull it out vertically - don't scrape it down! Lay it aside on the prepared paper
- Repeat for the other dividers
- Now remove both the end divider pieces and lay them with the other pieces
- Take the chopstick and in the right hand top corner put the chopstick into the mould all the way to the bottom vertically
- Start to move the chopstick making a continuous figure eight pattern (the infinity symbol)
- Remove the chopstick when you reach the other end
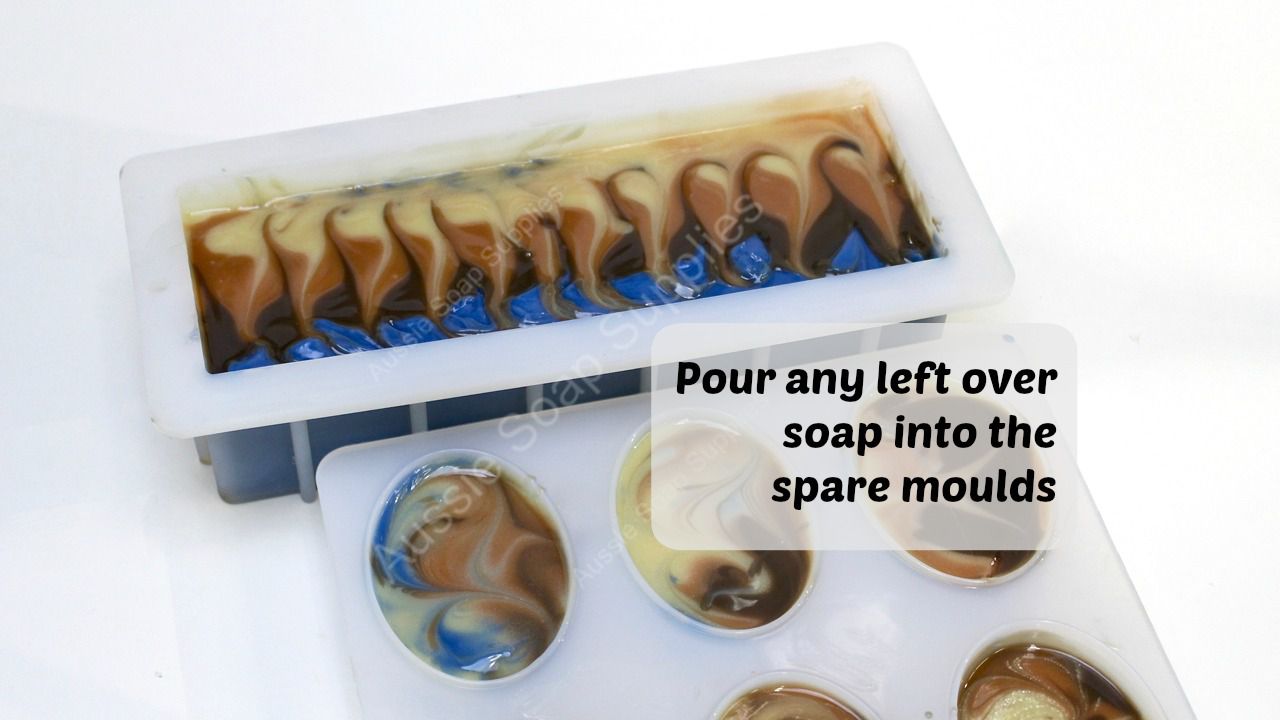
- Now it's time to take the leftover soap and pour or scrape it into the spare mould you have set aside. If you want to scrape the dividers you can do this now too
- To achieve the darker colours bring the soap to gel
- If you have a heat mat you can use this, or insulate using your usual method to encourage gel
- Because of the soft oils, full water content and silicone mould this soap is very soft
- Leave in the mould before attempting to unmould for one to two weeks
- Now you get to see that infinity swirl is all about how you cut the soap
- I recommend watching the slide show or the video again when it's time to cut the soap
- The soap is cut from the loaf into blocks, and then the block is turned 15° on it's side and sliced through making two bars
- Continue this method for the whole loaf
- Allow at least 6 weeks to cure and harden before use

You need to purchase Olive Oil, Distilled Water and Sodium Hydroxide separately. The second mould for leftover soap not included in trolley items. There will be left over ingredients in varying amounts.
| Palm Oil Free: | Yes |
| save: | No |
| sale: | No |


