I've been on a bit of a nostalgic soapy thing lately, old ideas brought up to date, and this one has been around a while, but deserves to be aired again :). The first time I saw bubble wrap being used to make a honeycomb pattern in soap was about 20 years ago, and a clever Queensland soaper made a soap that really rocked. Since then soapers have embraced the concept, and I wanted to make some simple, single cavity soaps, ready to wrap.
This project is not only easy, but creates unique, rustic soaps, and you can use so many honey based scents. Apart from the Honey Soap Base you can include some fresh honey, which has humectant qualities, and complements the Pure Honey fragrance. My "old" soaps used a sheet of beeswax on top, with the little bee, and these new ones are made using the Bubble Wrap technique. You can layer a couple with white, as I have, or make them all a honey colour.
We've made life easy by using our Silicone 12 Cavity Square Mould (with a couple of spare Moulds on stand by), so the measurements are perfect for that mould! The instructions below are for the basic honey coloured bars, but feel free to have a play with layers! Pure Honey Fragrance does not discolour the soap.
TIPS: To ensure you have an even distribution of honeycomb "holes", use good bubble wrap (no popped or loose bubbles), and cut carefully exactly between the rows. If you cut the bubbles in half, they will sink down. That is a nice look too, adds to the rusticity, but if you want it completely even, take care with the air!
If you are planning on using the vanilla discolouration to achieve your honey colour, this took 5 months to fully discolour to that golden honey colour, so plan ahead. If you don't want to plan ahead, you can make a strong infusion of Rooibos Tea and colour your soap naturally.
To make one batch of 12 soaps, you need 12 x 130g of soap base = 1560g in total, so you'll need:
- 1600g Stephenson Crystal Honey Melt & Pour Soap Base
- White Soap offcuts - optional
- 20 - 30g/ml Pure Honey Fragrance (Depending on how strong you like the scent)
- Silicone 12 cavity Square Mould
- Medallion Gold Mica - Optional, but adds a lovely depth of colour and some sheen
- Isopropyl Alcohol in a Spritzer Bottle - Optional
Equipment:
Stirring spoons or spatulas
Knife to dice the soap
1 microwave safe jug - Needs to hold 1 litre or more. If you only have smaller jugs, you can make two half batches.
Electronic Scales are useful but not essential
A Thermometer is useful, but not essential
Offcuts of bubble wrap, cut into squares or circles to fit the moulds chosen
Method:
- Set out the ingredients, equipment and cut the bubble wrap and place in the mould cavities, ready to go.
Important: make sure you place the bubbles facing UPWARDS in the mould.
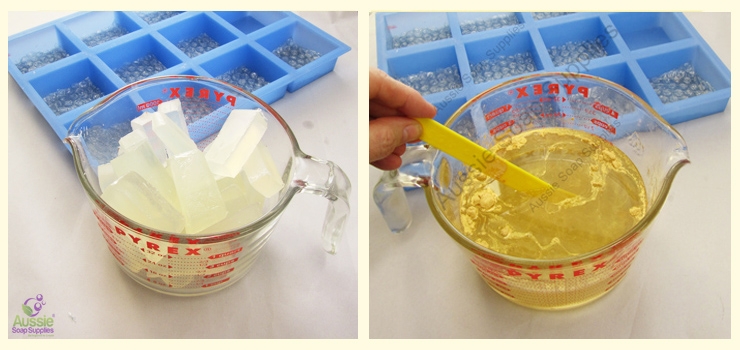
- Dice the soap base into small ice cube sized chunks, weigh and place in the microwave.
- Now lightly cover the jug of Melt & Pour Soap with a piece of cardboard to stop evaporation and put in the microwave to melt on medium or medium low. This will take a few minutes, so do keep an eye on it so it doesn't overheat.
- Remove the liquid Melt & Pour Soap from the microwave, and use approximately ½ teaspoon of Gold Mica if you are using it. (NB: You can mist in a little alcohol or water first, or add it direct. Stir well to remove any lumps, you may need to spritz with alcohol to remove surface lumps if you have added it dry).
- Now add 20g/ml of Pure Honey fragrance and stir well to combine.
- Carefully pour into the mould (the soap should not be hotter than 60°C). Pour slowly to avoid having the bubble wrap float up. It's a good idea to pour ½ cm of soap into each cavity, then go back and fill the moulds after each cavity has some soap it. annd this anchors the bubble wrap.
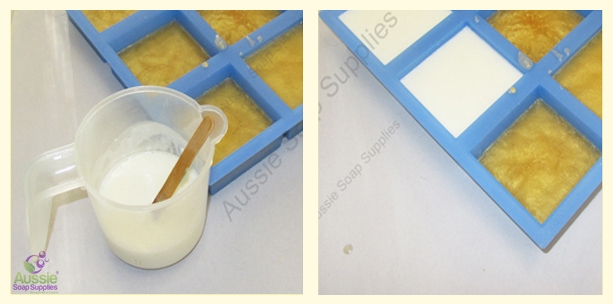
- If making two tone soaps, don't forget you need to spritz the first layer with alcohol before the second pour.
- Allow several hours or overnight to set up completely
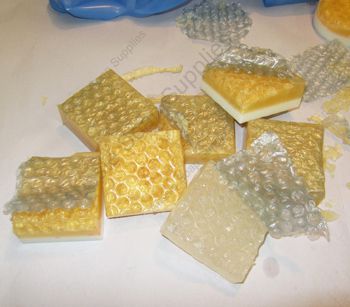
- Allow the soap to set up for several hours or overnight. Unmould by peeling away the mould, and then peel away the bubble wrap to see the design!
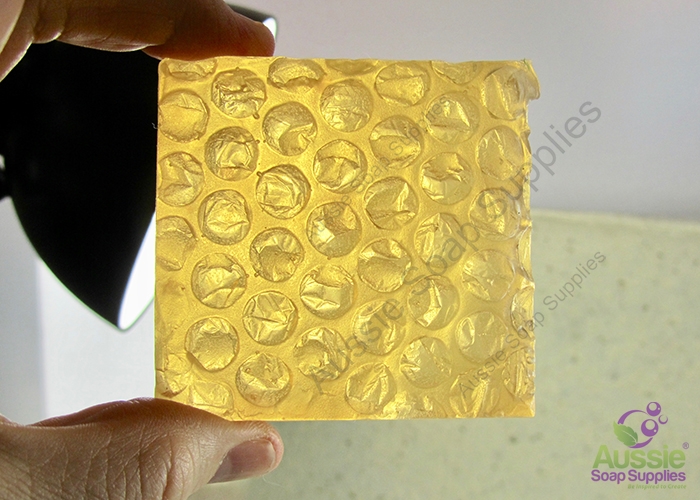
- As you can see, with no Mica or any colour at all, the light shines through just like through golden liquid honey in this bar which only has a little liquid honey and Pure Honey Fragrance.
- Now wrap or store in an airtiught jar.
Ingredients in the "add to trolley" contains 2 x Stephenson Crystal Honey Soap Base, and no white base. No alcohol is included the products list which you'll only need if making soap with the white layer.
| Difficulty: | Beginner |
| Yields: | 12 bars - 18 bars |
| Time: | 1 hour |
| save: | No |
| sale: | No |
