These soaps are great fun to make and they look really stunning when you join the two halves together! The swirled surface is totally optional but does add a nice touch when the two halves are opened. By using the Bath Bomb Mould Packs most of the packaging is already done - they can be tied with a ribbon or cord, or cut off the eyelet on the side and have them sitting in a bowl. Embellish at will ☺
We have used three colours and scents - these are perfect to use your favourite non-discolouring fragrance in and it takes very little Mica for a stunning effect.
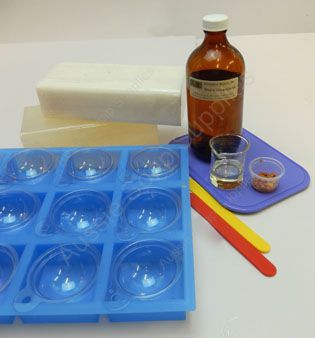
What you need:
- 1kg Clear Melt and Pour Soap
- 1kg White Melt and Pour Soap
- 2 x 10 pack Bath Bomb Mould Pack
- Isopropyl Alcohol and Spritz Bottle
Colour and Fragrance combinations we used:
- ¼ teaspoon Mica, Midas Gold hydrated in ½ teaspoon Sodium Lactate Plus - White Tea and Ginger Fragrance
- ¼ teaspoon Mica, Galactic Purple hydrated in ½ teaspoon Sodium Lactate Plus - Energy Fragrance
- ¼ teaspoon Seafoam Green Mica hydrated in ½ teaspoon Sodium Lactate Plus - Crisp Green Apple Fragrance
Equipment:
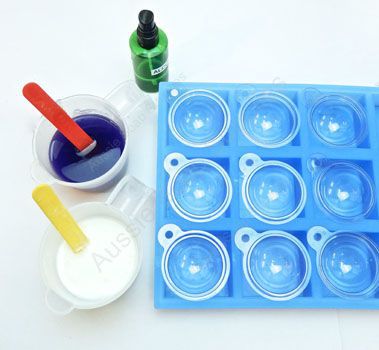
- 2 x Microwave safe jugs large enough to hold soap - ie if making 4 half soaps at a time you need 2 x 250ml jugs
- Isopropl Alcohol in Spritz bottle
- Usual Melt and Pour Soap equipment - spatulas, stirring sticks
- Thermometer - Recommended but not essential
How much fragrance?
We used 1 - 2g/ml per 100g of soap - that is between 1 - 2 droppers (20 - 40 drops), and if using Essential Oils the measurement is the same.
To stabilise the moulds we used our 12 Bar Square Silicone Mould to sit the two halves of the mould so that they were level whilst pouring and setting up. If you don't have this mould, you can use any divided mould that is the correct size, egg cartons, muffin trays, a bed of rice or clean sand or salt works too, and an old muffin tin is also suitable. If using granules such as salt or lentils you need to ensure the "nest" you make stays put whilst the soap sets up. I like that the silicone keeps the half spheres nice and steady without them slipping.
Method:

- Hydrate Micas in small plastic cups with Sodium Lactate Plus, and prepare moulds etc. If you don't have any Sodium Lactate on hand, you can use water

- Dice soap bases, placing white pieces in one jug and the clear pieces in the other jug
- Place in microwave and heat on medium/low in 30 second bursts until there is just a small piece of soap remaining
- Remove from microwave and stir to dissolve any small pieces of soap that have not melted
- The temperature of the should be around 55 - 60°C.

- Add some Mica colour to the clear portion, and fragrance to both jugs. Stir well to incorporate both and check the temperature.
- Temperature is important depending on the look you want to achieve
- If you want the true Saturn style soap the coloured soap needs to be 3 - 5°C above the temperature of the white soap's temperature. This means it is thinner and will drop through the white soap leaving the white ring at the surface and the mica pattern on the outsides of the mould when set up

- If you want to swirl the soap (like marbles) you need to have the temperatures the same, around 52 - 55°C when you pour. So for the marble style swirls, take a jug in each hand, as pictured, and slowly pour the soap into the mould.
- For the Saturn soaps, because of the differing temperatures, you can either pour as above, or pour some white into the mould, then the colour and then fill with the white soap to the rim.
- Try not to get soap in the rim as it can be tricky cleaning this out for a nice neat finish.

- If you want to swirl the surface too, you can do this now with a stirring stick or tool
- Spray with isopropyl alcohol to remove any surface bubbles.


